Showing posts with label birds. Show all posts

Tuesday, June 25, 2019

Birdsong ACEO

Hello fine folks!  It's Susan here, welcoming you to today's edition of the Gypsy Soul Laser Cuts demo!  I have an ATC redux to share.


I have a bin of leftover chipboard parts.  This is different from a bin of leftover parts from assembly of, say, a computer or a bicycle; that's usually bad.  My parts bin holds pieces that are partially used but ultimately (gently) rejected for a project.

In this case, it's an ATC/ACEO from the sarcastic frenzy I was on a month or two ago.  One side was ripped off just like this one here, and the other a pretty yellow design.


I've been dying to do a project with birds in hats (have you seen these Little Hats? So cute!) so off I went.

It didn't go so well.

I wanted the hint of a musical background, so I pulled out a fine clear embossing powder and musical notes stamp.  Turned out the stamp details are way too tiny for embossing powder.  then I tried a larger musical stamp with a light brown embossing powder.  Fail.


I went back to the drawing board, or in this case, the paper pad with the yellow paper.  Instead, I found this music note paper and heard a choir of angels sing!  It had nothing to do with my state of overtiredness and mild frustration.  Really.  Ok.  I might've been imagining it.


In mere minutes I Mod Podge'd over both sides and adhered the musical notes paper and it's coordinating reverse on each side.  Once the papers were dry, I used a straight edge to cut off the excess.

I used the same Mod Podge to attach the three elements.  (The bird was a fiddly and wouldn't wear a hat, so I gave up on that idea.)

Once those layers were dry I cleaned up the edges with sandpaper, painted them with Archival Brilliance Galaxy Gold and Coffee Bean inks, then finished with a matte varnish.


Thanks for your visit today! 

Gypsy Soul Laser Cuts Used

Other Supplies Used
MME /Lost & Found/ Sunshine 6x6 paper
K & Co Brenda Walton Design Elements
1/8" snap-together letter stamps
Archival Brilliance - Coffee Bean Ink
Liquitex Basics matte varnish
Mod Podge - matte

Monday, August 28, 2017

Winter Tree

Hello Crafty folks!  I have my August 22nd Gypsy Soul Laser Cuts team post to share with you... er, a few days late.

***

This week here in Maryland the heat indices have been reaching the upper 90s.  It's awfully warm!  I needed a mental break from it and this wintery scene did the trick.


This was a quick project until it came time to make the polymer clay bird.  I tried really hard to make a proper cardinal, but it wasn't in the stars.  We'll just have to use our imagination, 'k?  He's red.

I used the 3 inch 3D Chipboard Tree from Gypsy Soul Laser Cuts.  This tree has delicate branches with tiny connectors.  I pushed my blade into the obvious connectors and held the tree up to a light to find the not-so-obvious ones. It worked like a charm!


The next step was to gesso the whole tree, including the sides.  I used a foam sponge and a lot of patience to go around each branch.  After it dried I double checked the branch edges and filled in missed spots.


On the next layer I dabbed white acrylic paint all over.  Dabbing it on created the tree texture.  I moved the trees off the leftover paint and let them dry on the spatulas.  This step was repeated on the other side.


When dry I put the trees together.  I had to use a straight edge to clear away excess paint from the grooves so the trees were even at the base.

I used a gorgeously weathered clapper from an old wind chime as my base.  A tiny bit of e6000 on the tree holds it to the clapper.  I added bits of moss to finish off the earth.


From tip to toe this is 4 inches tall.  It's so sweet!  I'm now on the lookout for a small glass cloche under which I will tuck this lovely winter scene.


Thanks for visiting today!

Cheers,
Susan

Gypsy Soul Laser Cuts Used
3D Chipboard Tree 3 Inch #C1C

Other Supplies Used
Green moss
White gesso
White acrylic paint
White glue
E6000 glue
Polymer clay
Red acrylic paint

Saturday, February 8, 2014

ATB - Artist Trading Block - Swap

Hiya folks! I recently participated in ATB (artist trading block) swap over at Craftster. The block had to be the same height and width as an ATC, with the added depth of 1.5". The Husband whipped out the power tools and made me a bunch, plus cut a hole right through this one!


Nurture. The wooden letters were colored with an olive Copic.


The eggs were made using paper clay. I painted them bone and the speckled with browns.


Thanks for visiting today!

Cheers,
Susan

Monday, January 27, 2014

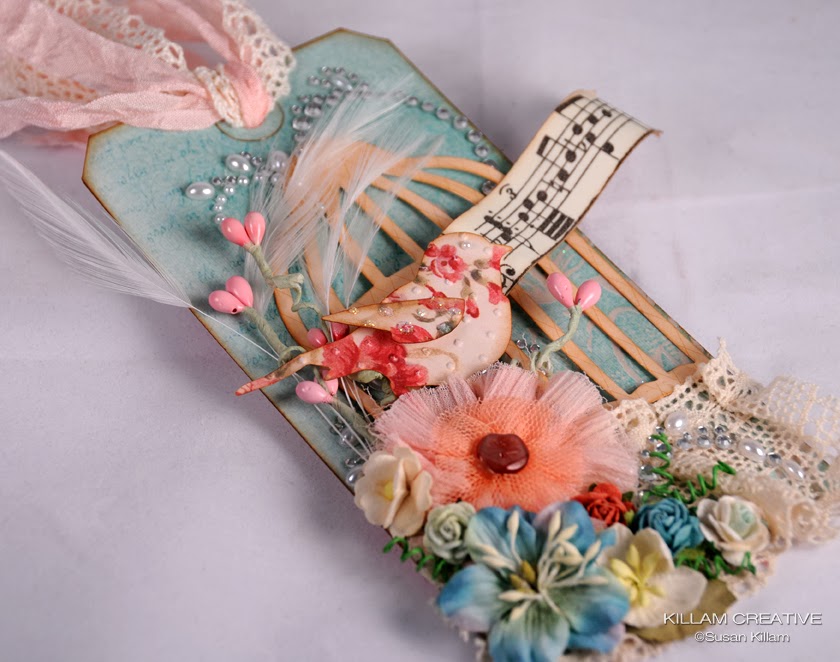
Birdsong Tag, Take 2

Hiya folks! (Remember me? I'm baaaack!)

Almost 3 years ago I made the Birdsong Tag. It's all over Pinterest and (hopefully) has inspired loads of crafty peeps.

Recently I received a request to buy it. While it's not for sale, I was thrilled to make an updated version for a Very Nice Lady. *waves hi to VNL*


It's a good thing I'm a hoarder I recognize quality supplies and keep them at my fingertips as long as needed. *grin* I added a cage and freshened up the flowers a bit.

Thanks for stopping by! Tomorrow I'll show the second tag I made for the VNL. I love it so much it was hard to ship off. :)

Cheers,
Susan

Thursday, May 17, 2012

Asian Inspired Bird Card

Hello there! If you tiptoe quietly down the page you'll see a pretty little bird on a painted branch. Go ahead. I don't think you'll disturb him.


Isn't he sweet? He's from a K & Co. die cut and vellum pack - I think it's a Brenda Walton branded one that I know is still available at Hobby Lobby.

The branch is Dusty Attic's Cherry Blossom but the shape was too perfect for this gorgeous blue and green Basic Grey Kioshi paper. I painted the flowers and branch with Adirondack Paint Dabbers then touched them all up with Gathered Twigs Distress ink. (My favorite brown EVER.) Funny that I hardly ever use the dabbers and these 4 colors just happen to be almost all I have... how's that for serendipity? The centers are this funky liquid embossing stuff I bought last year and never used. I like the 3D aspect of the centers, so the liquid embossing stuff gets a reprieve.


Thanks for stopping in today to see my Asian-inspired card. It makes me feel calm and happy...

Cheers,
Susan

Monday, April 9, 2012

A Bird Does Not Sing...

Hello and happy Monday crafty folks! I hope you had a gorgeous weekend and your Monday started with a smile. :)

I've been working on beaded hat pins and brooches and such for so long that I haven't touched paper in ages. Feels like it, anyway. My smile comes from the sheer joy of remembering *how* to make a card and making one from the delicious Pion Designs "Fairytale of Spring" paper. I've been sitting on it for weeks and finally used a wee bit this weekend.


Before I started, I knew I needed a little poke to send me in the right direction. My lovely friend Linda, also known as The Funkie Junkie, started up a new vintage-themed challenge blog called Frilly and Funkie. The challenge theme is "I'll Take Your Word For It" and the idea is to let a sentiment take center stage on your project.

I wanted to use my new Pion Designs paper, but I don't have a lot of sentiment stamps that would work with it. After searching around bit I found this bird one hanging out with the punches in the shoe rack behind the door. Perfect! The bird is from a package of K & Co. die-cut bits and the branch cut from a PD paper using the Tim Holtz/Sizzix Mini Branch die.

The music notes are Dusty Attic, onto which I gobbed pale pink crackle paint... which didn't work very well. I covered it all in Glossy Accents to seal and set it aside for months (because I can't throw anything away). Finally it found the right project!

Flowers are a combination of really old Wild Orchid and brand spankin' new Wild Orchid. The crochet flowers are Michael's Recollections line. I added the stamen to the bottom one and used the top left one as a mini doily.

In case you're wondering, I got the hard-to-find Pion Designs paper collections from Linda's Etsy shop. You can still shop there, or at her new Zibbet shop. It's just a coincidence that I'm entering a Funkie Junkie challenge with Funkie Junkie paper. It doesn't get me an advantage or anything... does it? *wink*

Thanks for visiting today!

Cheers,
Susan

Friday, February 17, 2012

A Lovely Pair!

Hello folks! I hope you are having a fantastic start to your weekend. I'm not sure, but I think Husband just talked me into repainting the family room tomorrow. My head is still spinning a bit. Of course, I'm the "painter" of the family so you know who will be doing the bulk of the work... The ceilings are ridiculously high. Ugh.

Anyway, I'm here to show you a bit of my goings-on for the past week. For a set of twins I needed a set of similar cards. Simple style was important as was pastel coloring. I think I'm pushing the edge of pastels...


These papers are from the much-beloved Basic Grey Curio 6x6 pad. I've been saving these designs for the right projects and am happy to be able to combine these favorites! The flowers are from Prima and the stamens added by me. I'm not sure how it looks on your monitor, but the flowers really do complement the background papers. It looks a bit funny on my screen, but in person they all work well. :) The birds are from a great K&Co. die cut pack called "Flora & Fauna". (There's one bird per pack.)

Here's a side view to see dimension. The birds edges were rounded under and it was attached to the white layer with 1/16" foam dots. The white layer is popped up on 1/8" dots.


That's it for me tonight! Thanks for visiting. I hope you have a productive weekend! Next week I'll show you some Graphic 45 projects I've been working on. Fun!

Cheers,
Susan

Tuesday, November 8, 2011

A Custom Thank You Card

Hiya folks! As you might know, I have an Etsy shop where I sell my cards, stick pins and mixed media art. I am fortunate to have wonderful customers who visit my shop often. Every once in a while I am asked to customize a greeting card. This is one of those cards.

I've used the My Mind's Eye Portobello Road papers over and over. It's quite possibly my favorite line! My lovely customer Lynn purchased a card weeks ago and framed it. Last week she contacted me to make a "thank you" card for a special person in her life. She wanted something similar to the framed card that would be appropriate for a male.


There is an extraordinary amount of layering going on here! I just couldn't stop. :) What I want to share the most is the grasses on the right. That is a Dusty Attic laser cut on which I painted a luminescent white acrylic then dabbed on a light bluish-green. Over top I layered Ranger's Rock Candy Distress Crackle Paint. I love the effect!


I used a combination of 12x12 sheets and pages from the 6x6 pad. The blue plaid and the birds on front are both 12x12.

For all the embellishment I do on many of my cards, I'm really struck by gorgeous, simple cards. It's a rare occasion for me to make one of those. :)


Thanks for visiting today.

Cheers,
Susan

Monday, June 13, 2011

TBS DT: For The Birds

Hiya crafty friends! I hope you had a great weekend. We got rained out at a local minor league baseball game. It was a shame since the game had serious promise (1st- and 3rd-placed teams in the league). Anyway... I can hear your yawns, so I'll get on with my BSC #27 sketch sample. You still have a little time to get crackin' on an entry of your own and have a great chance to win a $20 gift voucher for The Beary Scrap! This sketch proved to be a bit challenging for some folks - are *you* up to the challenge?

For this project I relied on my My Mind's Eye Portobello Road paper and embellishment collection. I threw in a little Bazzill brown, distress ink and an assortment of adhesives. Seriously! All four of My Mind's Eye's Lost and Found collections are like one-stop-shopping for cardmakers!


Card Recipe
 I hope this can inspire you to join our Beary Sweet Sketch challenge - you have until Midnight tomorrow (Tuesday) to come and play!

Cheers,
Susan