****
Hi crafty folks! Today I want to share a vintage-style American dream tucked inside the 4" x 4" Mini House Room Box. This young couple is just starting out and have saved their pennies for a home. Let's build it!
First thing is a bit of a warning that this is an image-heavy post. A lot goes into home construction. ::nod nod::
I measured and cut vintage ledger paper to cover the back wall (including the attic area) and side walls.
Brick is my favorite construction and this young couple deserves the best! I used the Brick Wall 2 stencil and molding paste on the back and sides. Allow it to dry overnight.
For the roof I used the pointed Chipboard Shingles. I gesso'd a bunch then cut them down to 4 points each, which allowed me to stagger the points. Next thing was to glue them down and allow to dry, then cut with heavy duty scissors. I tried to use a guillotine paper cutter but the shingles were too thick. A little sanding helped to clean up the cuts.
Time to paint the bricks! This isn't a real brick factory so I had to paint them... You know how it is. I've made bricks a couple of ways so far, and this time I used my education teammie Nicola Battilana's video tutorial. It was very helpful!
I glued tiny little rocks to the base and let it dry overnight.
So back to the roof! I needed to cap it off. My idea was to cut a piece of thin chipboard, score it, and glue it down. In the second photo, you can see I found a big enough blank in the middle of another GSL Cut laser cut. Yay!
To finish off all the roofing edges I mixed molding paste with black gesso (even though the photo shows acrylic paint -- oops). I carefully applied it to the peak and all the edges in layers, allowing it to dry each time. It took a couple of layers to fill it all in and look like roofing tar. Or whatever that's called. The black stuff!
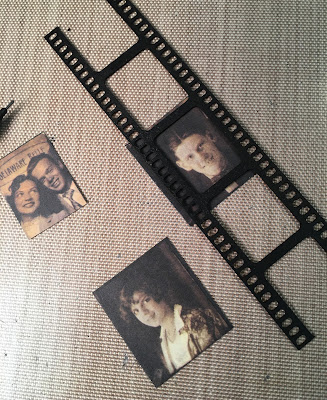
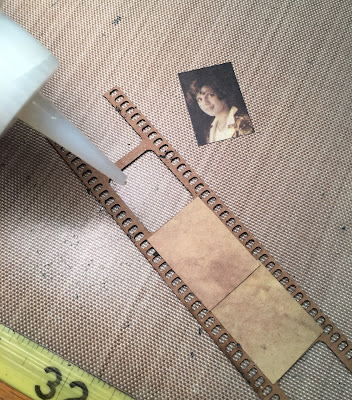
For an inside element I used a piece of felt (just because it was close by) to dab black paint on a Filmstrip Mini Sheet then cut down photos of the couple.
And finally, they moved in!
Here's a view of the filmstrip and see their first house number plate? That's from the white set of Faux Metal Number Plates. There is a mini wood spool popping out from the back wall.
Here's a finish view of the roof peak. See how I softened the edges with the molding paste mixture? Once that was dried I did a bit of finish work with a fine sand paper and coated it all with flat black paint.
GSL Cuts Used
Mini House Room Box 4x4 Open #D13WB
Chipboard Shingles - Pointed #D119P
Brick Wall 2 #D42D
Filmstrip Mini Sheet D12J
Faux Metal Number Plates (White) #LN042114001


No comments:
Post a Comment